Tips to Treat Back Contractures and Spasms
Manual therapists routinely use bones as levers to reduce tension and protective spasm in hypertonic muscles. For example, the femur and humerus are excellent tools for stretching tight hip and shoulder girdle muscles, and we commonly rotate and sidebend a client’s head to relieve neck tension. However, I’ve noticed in workshops that therapists are sometimes uncomfortable applying direct pressure to the spine to help relieve back spasm. I feel this is a missing piece in many therapeutic interventions. Here, I’ll explain the benefits and application of bones-as-levers myoskeletal techniques designed to ease back pain.

Focus on facets
Notice in Image 1. how the deep transversospinalis (groove) muscles encase the spine with some branches spanning only a single vertebral segment. These short lever muscles are loaded with sensory receptors that alert the brain of undue stress or instability. My mentor, the late Dr. Philip Greenman, past director at Michigan State University College of Osteopathic Medicine, referred to these spinal groove muscles as “dynamic ligaments” and claimed their primary function was to protect and stabilize the spine, not to move it. No matter how we view their intended function, it’s clear the rotatores, multifidi, and intertransversarii are acutely sensitive to disruptions in normal facet joint movement.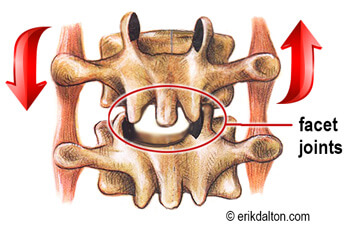
Not surprisingly, this normal opening and closing motion is often altered in aging or abused spines due to facet cartilage degradation and reactive muscle spasm. For example, Image 3. demonstrates how a hypercontracted intertransversarii muscle on the right prevents the joint from completely opening during forward bending. Can you picture how it would also cause the transverse process on the right to rotate posteriorly? Try this with a plastic spine.
When muscle, ligament, and joint capsule mechanoreceptors are exposed to this type of sustained jamming, they react by flooding the spinal cord’s neuronal pool with warnings of physiologic distress. In some cases, prolonged mechanical tension due to overuse, trauma, and suboptimal posture will escalate into a full-blown inflammatory response that triggers neighboring chemoreceptors. The spine’s neuronal pool can typically handle one or the other, but not both.
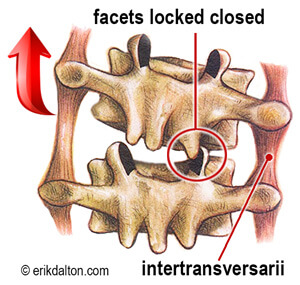
Combined mechanoreceptor and chemoreceptor stimuli may force activation of danger-signaling nociceptors. These fast-track information to the brain, warning of the possibility of tissue damage. The brain often won’t release the spasm until normal facet joint movement is restored. This leads us to the burning question: “How are we to relieve this spasticity when we are unable to palpate the tiny transversospinalis muscles with our fingers?”
The first thing that probably comes to mind is to try to stretch the spine in an effort to relieve the spasm and joint fixation. This approach frequently falls short as neighboring joints stretch “around” the dysfunctional segment. Instead, we must isolate down to the stiff area with the client first in flexion (facet opening), then extension (facet closing) as we assess the movement of the spine’s transverse processes.
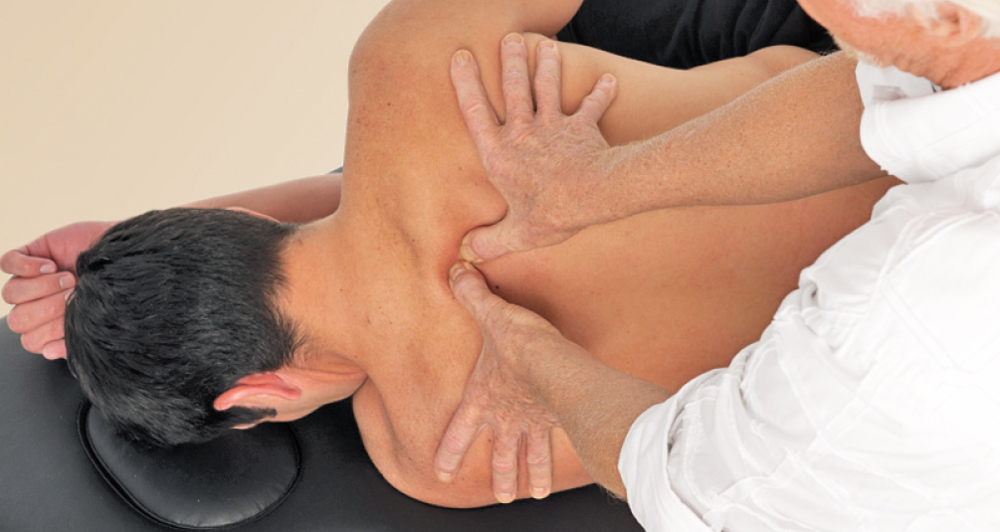
Addressing thoracic (between-the-blade) stiffness and pain
Addressing low back stiffness and pain
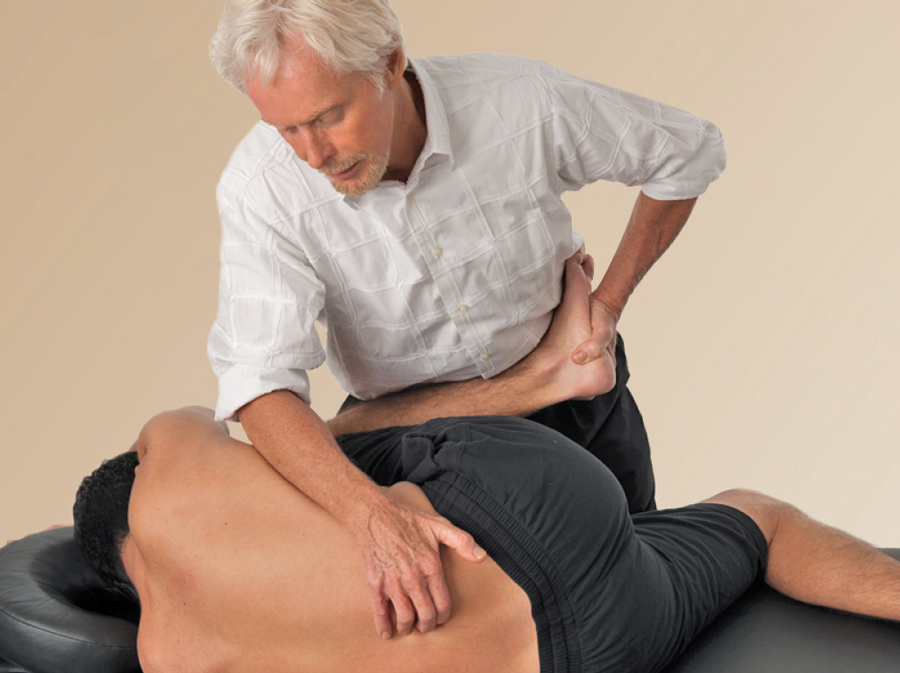
With the client’s hip and torso flexed, the fingers of my right hand work into the lamina groove at L-5 while my left hand controls the amount of hip flexion (Image 5). The goal here is to drag the sacrum inferiorly during flexion while palpating for a transverse process pushing posteriorly. This indicates that the joint is not gliding open as it should. To ease the transversospinalis muscle stiffness that’s preventing the joint from opening, my fingers pin the motion-restricted transverse process as my left hand introduces more hip flexion to the first restrictive barrier. To enhance this release, I ask the client to gently push his foot against my resistance to a count of five, then relax. I take it to the next restrictive barrier and repeat three to five times. Try these bones-as-levers myoskeletal techniques to help reduce spasm, enhance mobility, and optimize nervous system functioning.
Find these methods and more in the Upper Body Course
On sale this week only!
Save 25% off the Dalton Technique Tour course!
NEW! USB enhanced video format
Discover deep tissue, pin and stretch, nerve mobilization, and graded exposure stretches in this comprehensive “technique only” program. Upon completion, you will receive 16CE hours and a certificate of completion to display in your office. Save 25% this week only. Offer expires Monday, January 19th. Click the button below for more information and to purchase the course.
BONUS: Order the home study version and get access to the eCourse for free!
