Addressing Arthrokinetic Reflexes
The term Arthro (joint) Kinetic (motion) Reflex was coined by University of Pittsburg researchers to describe how sensory input from joint movement reflexively activates or inhibits muscles – and no other place in the body is this concept more applicable than in the joints and connective tissues of the shoulder girdle. If sensory input from the sternoclavicular (SC), acromioclavicular (AC) and glenohumeral (GH) joints convey the idea that shoulder movement is safe, the nervous system will loosen its governor on rotator cuff strength and range of motion. If the information suggests the movement is dangerous, the brain may protectively guard the shoulder via muscle stiffness, pain, weakness, or altered coordination.
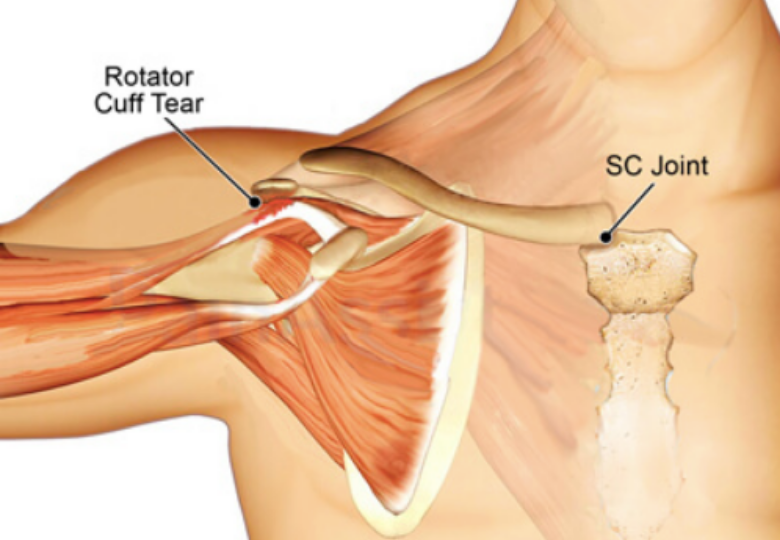
The myoskeletal method seeks to first restore shoulder girdle function by clearing SC, AC, and GH joint fixations, and then assess for possible rotator cuff injury. In this blog, we will focus on the neurology and kinesiology of a very important and oft-overlooked pivot joint that provides the only firm attachment of the shoulder girdle to the axial skeleton, and then I’ll demonstrate three of my favorite sternoclavicular joint techniques.
Movement Map Issues
Articular mechanoreceptors in shoulder girdle ligaments and joint capsules transmit movement information to the brain at a speed of 300 miles per hour where a movement map is created. Depending on the stimulus or lack thereof, these receptors can inhibit or facilitate surrounding muscle tone. A simple way to think about this is that “joint fixations” typically result in weaker muscles and mobile, freely moving joints promote stronger muscles. So, when a joint has been strained or locked in an abnormal position, it can cause a map clarity issue resulting in mild muscle strength alterations and loss of functional range. This is a protective mechanism the brain uses when it can no longer predict the movement that’s occurring. I’ve found that many rotator cuff injuries involve “map” problems due to dysfunctional joints.
Testing and Treating Three Common SC Joint Fixations
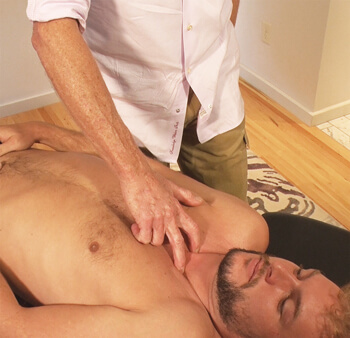
Rotator cuff impingement syndrome typically occurs when the supraspinatus tendon gets squashed between the humerus and the scapula’s acromion process during arm abduction. One of the primary and oft-overlooked causes is insufficient SC joint elevation of the proximal clavicle. Recall that the SC joint should always move in an opposing direction to the scapula. Yet, tension, trauma and sub-optimal posture may cause the clavicle to get locked in a superior position on the manubrium and unable to glide inferiorly as the arm is raised. In these cases, manual and movement therapy to treat a frayed rotator cuff tendon might include gentle compression of the proximal SC joint with one hand while protracting the shoulder girdle with the other (Image 1.)
To assess for SC restrictions, we need to determine if the medial clavicular head is dropping down during two movements: arm abduction and shoulder elevation (shrugging). In Image 2., I assess for an SC joint elevation restriction by placing both index and middle fingers on top of the client’s medial clavicular heads and asking him to first shoulder-shrug and then to horizontally abduct each arm. If one side does not drop down, there is a ligament or articular disc restriction in that SC joint. Try this on yourself by placing the index finger of your left hand on top of your right clavicular head and abducting the ipsilateral arm.
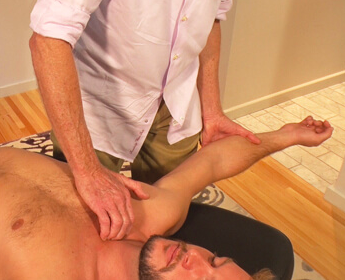
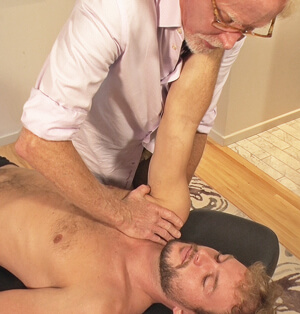
In Image 3., I demonstrate a technique for correcting a superiorly fixated SC joint. Notice how the fingers of my right hand firmly depress the client’s medial clavicular head as my left hand abducts his right arm. When I meet the first restrictive barrier, I perform a contract-relax technique to help mobilize fibrotic SC joint ligaments and the fixated articular disc. I’ve found the combination of arm abduction and extension to be very effective in helping restore motion in a superiorly fixated SC joint… but not always.
The third and most common restriction seen at this very mobile joint occurs during protraction of the shoulder girdle. In Image 4, I assess by placing the thumb of my left hand on the anterior border of the ipsilateral clavicular head. The client is asked to lift his arms to 90 degrees and reach toward the ceiling. My thumb should feel the client’s medial clavicular head translate posteriorly during this maneuver. If the clavicle does not move posteriorly, the restriction will often alter acromioclavicular and glenohumeral movement causing reflex rotator cuff spasm.
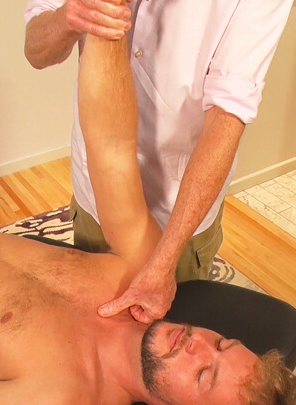
To treat a right anteriorly fixated SC joint, I ask the client to bring his arm to 90° and grasp the back of my neck (Image 5). As my right thenar eminence gently depresses his right SC joint, my left hand snakes under his right scapula and creates a counterforce as I lift. The client is asked to gently pull down on my neck as I lift his shoulder and gently resist with my right hand. This arthrokinetic reflex technique is very effective in helping relieve the protective guarding associated with SC joint fixation. By working with the client’s nervous system to increase tolerance, mobilization with movement also psychologically reinforces to the client that he can move the arm through a greater range of motion. Try these maneuvers prior to treating rotator cuff tendinopathy issues. Your clients will love it!
References
- Cohen, Leonard A; Cohen, Manfred L (1956). “Arthrokinetic Reflex of the Knee”. American Journal of Physiology. Legacy Content.
On sale this week only!
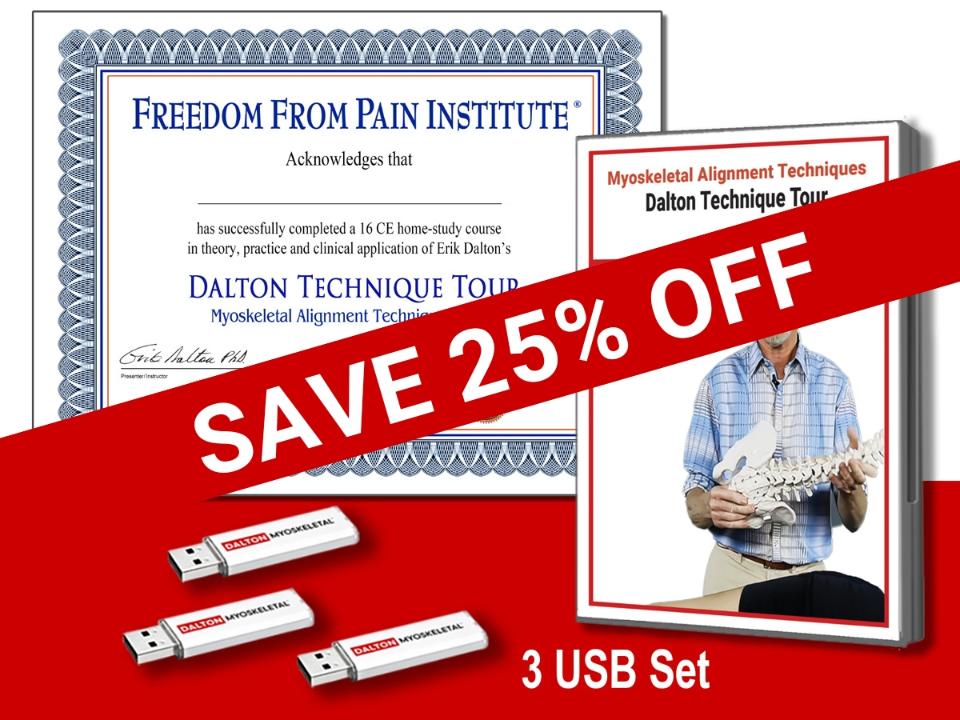
Save 25% off the Dalton Technique Tour course!
NEW! USB enhanced video format
Discover deep tissue, pin and stretch, nerve mobilization, and graded exposure stretches in this comprehensive “technique only” program. Upon completion, you will receive 16CE hours and a certificate of completion to display in your office. Save 25% this week only. Offer expires Monday, January 19th. Click the button below for more information and to purchase the course.
BONUS: Order the home study version and get access to the eCourse for free!
